 |
| "It transformed into a Mobile Suit!!" |
It's time for one of my favorite Gundams to make its grand entrance! This is the very first Gundam that I saw in my life (and, back then, it blew my tiny mind!) and I know that this is true to most Gunpla fans as well, especially to the Western folks.
Anyway, here's my first "No Grade" review. The "XXXG-01W Wing Gundam". As usual, all the information are past the break.
I. Unboxing
A. Box
 |
| Front Cover |
 |
| Hey, it's Heero Yuy. We can't see his sexy shorts. |
 |
| Left Side Cover |
 |
| Information about Gundam Pilot: Heero Yuy. |
 |
| Sample pictures of other kits available. |
 |
| Some warning notes in Japanese text. |
 |
| Right Side Cover |
 |
| Sample pictures of a painted Wing Gundam. |
 |
| Some specifications and sample pictures of accessories. |
 |
| Top Side Cover |
 |
| Bottom Side Cover with price tag. |
This opens like a typical Gundam Model Kit box, so you have to separate the top part from the bottom. Just slide the top part upwards and all the contents will be available to you! Yay! Now, we can see what's inside... (Probably parts and runners. If not, I got bamboozled!)
B. Contents
 |
| Slide the upper half of the box upwards to access contents. |
 |
| Contents are stored in 2 plastic bags. |
As usual, the runners and seals are all stored inside plastic bags. There are 2 plastic bags inside this kit.
 |
| Runner A1: 16 Parts |
 |
| Runner A2: 18 Parts |
 |
| Runner B1: 14 Parts |
 |
| Runner B2: 13 Parts |
 |
| Runner PC-110: 22 Parts |
Total No. of Parts: 83
That's a fair amount of parts! Notice that most of the parts are not in the right color. If you're not going to paint the parts, that's where the seals come into play.
 |
| Seals |
 |
| Construction Manual Front Cover |
 |
| Construction Manual Rear Cover |
 |
| Construction Manual Color Guide |
 |
| Construction Manual Runner Count & Page 1 |
 |
| Construction Manual Page 2 |
 |
| Construction Manual Page 3 |
 |
| Heero Yuy Figure Color Guide Front Side |
 |
| Heero Yuy Figure Color Guide Back Side |
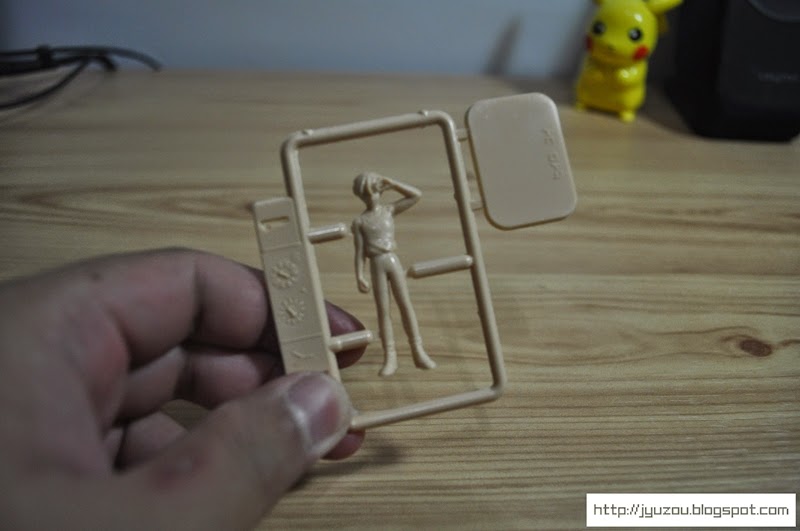 |
| You have to paint it yourself. I don't think I'll be making an attempt anytime soon... |
II. Assembly
 |
| Cut the parts off the runners... *sigh* I'm still not good at this. |
 |
| Section 1 of the Construction Manual is for the left leg. This is for the thigh part... |
 |
| Add the Leg Armor... |
 |
| ...then add the left foot. Done. |
 |
| Section 2 are instructions for the right leg. exactly like the left leg, nothing new. |
 |
| Section 3 is for the left arm. |
 |
| Add the rest of the arms and the Shoulder Pads. Done. |
 |
| Section 4 is for the other arm. Done. |
 |
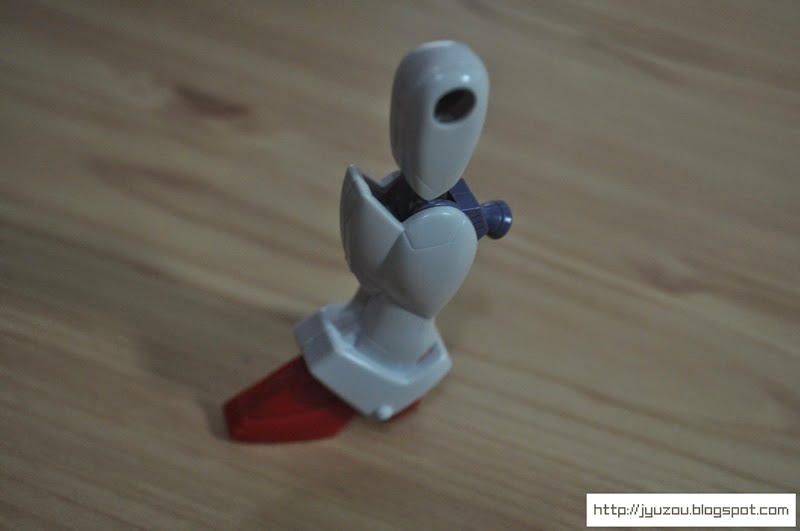
| Section 5, torso. Wing Gundam's belly! (What?) |
 |
| Add the chest part... (Looking good.) |
 |
| Assemble the hip part, where the legs will be attached... |
 |
| Combine the two, and... viola! |
 |
| Section 6 is for the wings. We can't forget that, that's the most important part. |
 |
| Section 7 is for the head. Then, section 8 are instructions for you to connect all the parts together. |
 |
| There will be 2 remaining parts from Runner PC-110 after everything is assembled. You can use it as a spare, I guess. |
III. Review
A. Basic Profile
As usual, we'll cover articulation, details, gimmicks and features, and accessories. But, before that, here are some basic profile pictures.
 |
| Front View |
 |
| Rear View |
 |
| Side View |
 |
| Height Measurement |
 |
| I tried mimicking the boxart... Didn't turn out well. |
 |
| "Freeze! Hands in the air, Leos!" |
 |
| Wing Gundam's Bird Mode. |
 |
| It's a pair of legs attached to a winged shield... What am I talking about? We all know that it's still awesome! |
B. Articulation, Details, & Gimmicks
Now, let's take a closer look at the kit itself. I advise readers not to expect anything spectacular. After all, this kit is almost 10 years old. I'm sure most of us have already bought some of the more modern Gundam Model Kits from the SEED, 00, and AGE Gundam Animes. I'll post the pictures below and just add some captions for my commentaries.
 |
| Here's a closer look at the head part. The head can rotate full circle, as this is required to perform the switch to Bird Mode. |
 |
| Details of the torso. The vents are molded in yellow, but the round yellow part in the chest part usually comes as a clear part in Higher "Grades". (Also, that's supposed to be colored green. There's a seal that comes with the kit to fix this.) |
 |
| The Shoulder Armor can go up this far. |
 |
| This is how it usually looks like, though. |
 |
| You need to move it downwards for the Bird Mode transformation. |
 |
| The arms can make a complete rotation from the shoulder and can move outwards this much. |
 |
| Because of the Bird Mode's "claws", the arms can't be folded completely. |
 |
| However, if you move the claws out of the way, you'll be able to fold it to more than 90°. It'll look awkward, though. |
 |
| From the elbow, you can rotate the arms 360°. The hands are connected via ball joints, so you can rotate it as well. |
 |
| Closer look at Wing Gundam's hips and Skirt Armor. |
 |
| The Front Skirt Armor is molded as one piece, so it goes up together. The Side Skirt Armor can also spread out slightly. |
 |
| The Skirt Armor can be tilted forward and backward. |
 |
| Here are Wing Gundam's legs and feet. |
 |
| The knees are the kit's parts with the most articulation. It's also the most annoying part, since it tends to loosen up quite quickly, making the entire kit unstable. |
 |
| Wing Gundam's feet can wiggle around and is connected via ball joint. |
 |
| Here's the back of Wing Gundam. The 2 rectangular holes there is where you connect the Shield for the Bird Mode transformation. |
 |
| "Fly, Gundam, fly!" |
 |
| The wings can be tilted sideways up to 90° and can be rotated from the point where it is connected to the backpack. However, the back of the Gundam will prevent it from being tilted at some angles. |
 |
| The hips can also be rotated 360° which is also necessary to the Bird Mode transformation. |
 |
| Alright! First, remove the fists... |
 |
| Tilt the Shoulder Pads downwards... |
 |
| Now, get that claw outta there! |
 |
| Fold the elbows so that it'll look like this. |
 |
| Then, do the same to the other arm. |
 |
| Rotate the hips... |
 |
| There you go. Almost there. |
 |
| Then, rotate the head... |
 |
| Spread the wings out! |
 |
| Now, for the trickiest part. Folding the legs so that the thrusters will show. |
 |
| There, it should look like this afterwards. It wouldn't be so hard if the whole kit doesn't feel like it's going to collapse with the slightest touch. |
 |
| Now, we only need the front part of Bird Mode! |
 |
| Connect the Buster Rifle upside-down to the Shield... |
 |
| Done. Looks cool and deadly. This is the Bird Mode's head or something. |
 |
| Remember the 2 holes at the back of Wing Gundam? Align the back of the Shield to that. |
 |
| Push gently to make sure it's secure... |
 |
| Wing Gundam in Bird Mode! "Wheee!" (I actually made "swooshing" sounds while playing with this in the air for a moment... Hey, don't look at me like that, I'm sure you'll try it, too.) |
 |
| It might look great, but it looks hideous when it's upside-down. |
C. Accessories
NG Wing Gundam comes with 3 accessories: The "Buster Rifle", its gigantic Shield, and a normal Beam Saber. Nothing more and nothing less, and that's pretty accurate since these are Wing Gundam's only weapons in the Anime.
 |
| Wing Gundam comes with it's basic armaments. One of Heero Yuy's favorite weapons, a basic Beam Saber. |
 |
| It also comes with its signature weapon, the Buster Rifle. It can only be fired 3 times, so Heero Yuy uses it to eliminate the small fries. |
 |
| Wing Gundam also comes with a ginormous Shield, although Heero Yuy doesn't really need this thing. But, it is essential for the Bird Mode transformation, and Heero Yuy does use it a lot for traveling purposes. |
 |
| Here's how you connect the Buster Rifle to the Shield. |
 |
| And this is how it looks like when combined. |
IV. Final Thoughts
As I was assembling this kit, I remember back then when I was still a kid and Gundam Wing was the coolest robot out there. We would buy cheap Gundam replicas outside school. Some of the rich kids were able to buy Gundam Models and they would bring it to school to show it to their friends (or to gloat). I have a friend back then who was able to collect a handful of these kits. I wasn't particularly impressed back then. The kits look flimsy. ...and when I got to hold some of them, they were indeed flimsy. Fragile. Not the sort of toy quality suitable for boys who play carelessly. Well, of course, now I'm more inclined in believing that Gundam Model Kits are for display purposes only and are for hobbyists, that these are not Action Figures. But, hey, we were kids. And we like Gundams.
These were the exact same kits that gave me a bad impression about Gundam Models in general back then. As a kid, I'd like to play with my toys around school. I remember someone gave me a Gundam Model as a gift, I just don't remember who... (It can't be my parents, though. I remember the first time I got my first PlayStation. It was around the time when the PS2 was already 2 years old. LOL. Anyway, pretty sure it was not my parents.) I remember how frustrating it was playing with these things. It was hard to move the thing without pieces falling off, the stickers are falling off as well, the colors are off, it's a pain in the neck to transform it to Bird Mode, etc. I know I was just misinformed about Gundam Kits back then. But what did you expect when you give a kid a cool-looking toy box, then he compares the actual kit to the sample pictures?
So, like I said, these are the exact same kits back then. Don't expect anything fancy since this is just a re-run of some sorts. Nothing is improved, nothing has changed. They're still the same flimsy and fragile kits like before. So, potential buyers can either see this as a disappointment, or a challenge to make it look better by modifying/painting methods (and I've seen a lots of No Grade Kits on the web modified so well that they look like Master Grade kits). I'll take it as a challenge! Hah! (What could possibly go right? I mean, "wrong".) That's why I didn't use the stickers, I'm planning on painting this kit in the future.
 |
| Here's a more intimidating pose before I end this Gunpla Review. |
that's a very detailed review! awesome =) perfect if there's more close up pictures of Heero Yuy!
ReplyDeletethat's a very detailed review! awesome =) perfect if there's more close up pictures of Heero Yuy!
ReplyDeleteNice review 👍👍👍.. just want to complete the 5 gundams from the wing collection.I think repainting can improve how it looks like.thanks man..
ReplyDelete